Improve your wifi reception by selecting the channel with the least interference.
Wi Fi routers typically run on 2.4Ghz or 5Ghz frequencies. Other items, such as cordless phones and baby monitors often run on the same frequency range.
Within this range there are 11 channels available on 2.4Ghz and more on the 5Ghz setup.
OSX has a built in tool to help you scan the surrounding Wi-Fi signals and look for the channel with the least interference. With this information, you can setup your Wi-Fi router accordingly.
[last-modified]
Step 1: Open Wireless Diagnostics

Head up to your Mac’s menu bar and track down the WiFi icon. Once you’re there, push down the Option key ⌥ (next to the CTRL key) on your keyboard and click the icon at the same time. This will bring up a secret menu with a bunch of other information. Near the top, select the option called ‘Open Wireless Diagnostics’.
Step 2: Scan your network

When you’ve got the Wireless Diagnostics window open, head to the top left of your display towards the menu bar again, click on the ‘Window’ option, and then ‘Scan’.
Note: if you’re feeling like a pro you can also type CMD + ⌥ option + 4.
Step 3: Find your optimal Wi-Fi channel
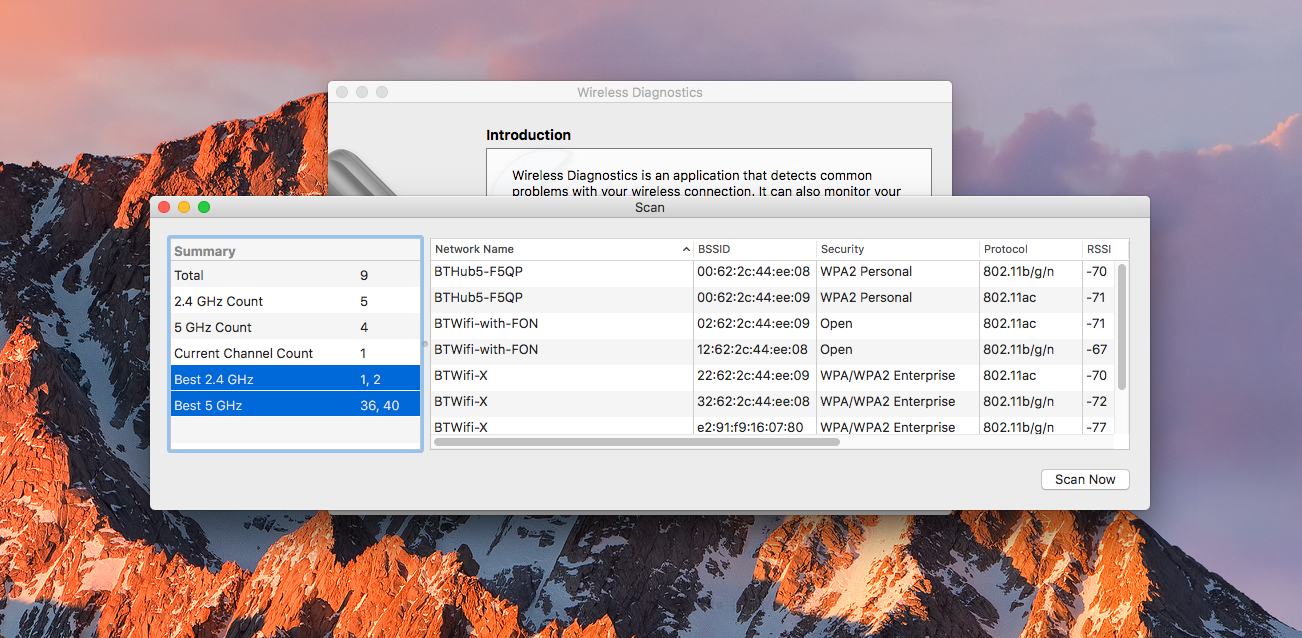
Clicking on Scan will open up a new window with all the wireless networks around you, along with a bunch of other data. If you want to find the best WiFi Channel, you’ll want to look for the left column where it says “best 2.4GHz” and “best 5GHz”. Just click on ‘Scan Now’ on the bottom right of that window to refresh the results!
When you have that information, head into your router’s WiFi settings and adjust the Wireless Channel to the ones recommended.
For more news and advice on using your Mac and iPhone, check out our blog www.mac-ops.co.nz/Blog,